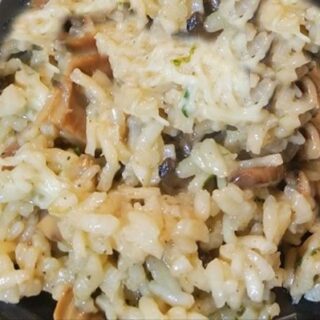
Tag Archive for: cooking class

Mushroom Risotto

Mushroom Risotto

Yield: 4
Prep Time: 1 hour
Cook Time: 40 minutes
Total Time: 1 hour 40 minutes

Ingredients

  • 4-6 Cups Low sodium vegetable stock or chicken stock
  • 2 Tablespoons olive oil
  • 1 shallot finely chopped.
  • 2 cloves garlic, crushed.
  • 1 pound Shitake or a mix of mushrooms of your choosing
  • 2 Tablespoons unsalted butter
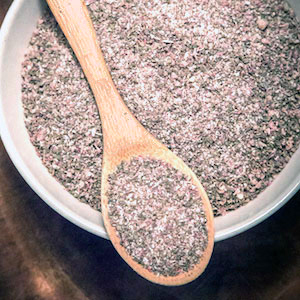
  • 1 teaspoon My Sage Gourmet's Savory Spring, Summer, or Tuscan Blend
  • 1/2 teaspoon Fresh cracked Black Pepper and the zest of one lemon
  • 1 1/2 Cups Arborio rice
  • 1/2 Cup white cooking wine (Any dry white wine will do)
  • 1 Cup + 1/2 Cup reserved for topping, freshly grated parmesan cheese
  • 1/2 Cup fresh chopped parsley for topping

Instructions

Over High heat into medium pot, add stock and bring to a boil.

Once boiling, move to a back burner on low heat.

In a deep wide pot, heat olive oil to medium heat, test heat by adding a small piece of shallot. It should simmer, not pop. Reduce heat, if necessary, then add remaining shallot and cook until translucent, stirring frequently.

Add mushrooms and butter. Cook until mushrooms have reduced and softened.

Add garlic, My Sage Gourmet seasoning, and pepper, stirring for 1 minute or until butter is melted.

Add Arborio rice, stirring to coat on all sides. Let toast for a few minutes until well coated and a nutty scent forms.

Add wine and cook till evaporated, stirring often.

Add 1/2 cup of stock, stir to combine, then add another 1/2 of stock. repeat this process until most if not all of the stock is added, allowing it to absorb after each 1/2 cup add, before adding more. This crucial step makes this dish come out perfectly- don't rush it.

Once you reach the perfect consistency, no need to add more stock. You may have some left and that is ok.

When done, remove from heat, Add 1 cup parmesan cheese, and stir to combine.

When serving top with parsley and more parmesan if you wish to.

Sprinkle a bit of fresh pepper over the top. Perfection!

Notes

Risotto is one of the more satisfying dishes to make. The way it transforms, its depth of taste, it really does make one feel like they've created something spectacular.

I sometimes like to use a mixture of wild mushrooms in this dish for a little extra wow.

Enjoy!

Nutrition Information:
Yield: 4 Serving Size: 1
Amount Per Serving: Calories: 500Total Fat: 21gSaturated Fat: 9gTrans Fat: 0gUnsaturated Fat: 11gCholesterol: 39mgSodium: 1500mgCarbohydrates: 60gFiber: 6gSugar: 14gProtein: 16g

Stay connected

Follow us on Instagram

Gluten Free Chocolate Chip Banana Muffins

Gluten Free Chocolate Chip Banana Muffins

Yield: 1 dozen
Prep Time: 10 minutes
Cook Time: 22 minutes
Total Time: 32 minutes

Delicious and Healthy-ish gluten free muffins you will love.

Ingredients

  • 1 cup Cassava flour
  • 1/2 cup Coconut flour
  • 3/4 teaspoon baking powder
  • 1/2 teaspoon apple pie spice blend
  • 1/2 teaspoon sea salt
  • 3 small very ripe bananas (about 1 cup mashed)
  • 1/4 cup pure maple syrup
  • 3 tablespoons NuNaturals
  • 2 tablespoons blueberry syrup
  • 1/2 cup coconut oil, melted and cool
  • 1 whole egg (room temperature)
  • 1 teaspoon pure vanilla extract
  • 1/2 cup dark chocolate chips

Instructions

  1. Preheat oven to 375 degrees
  2. Lightly grease muffin tins or use liners.
  3. In a medium bowl whisk together cassava and coconut flours, baking powder, baking soda, apple pie spice blend and salt - set aside.
  4. In a separate large bowl, combine mashed banana, both maple syrups, coconut oil, egg and vanilla extract whisking together.
  5. Fold dry ingredients into wet ingredient bowl stirring gently to combine.
  6. Gently fold in chocolate chips
  7. Spoon batter into muffin tins filling ¾ of the way to the top
  8. Bake approximately 20-22 minutes depending on your oven
  9. Allow to cool 10 mins on a rack then hide them from your family 😊 Or Share if you dare!

Notes

I recommend Bob's Red Mill Flour
If you prefer not to use NuNaturals Maple Flavored Syrup, increase the maple syrup by 1 tablespoon instead. I find it plenty sweet either way.
You can find both of these items on Amazon, at Sprouts (certain locations) and Thrive Market.

Nutrition Information:
Yield: 12 Serving Size: 1
Amount Per Serving: Calories: 242Total Fat: 13gSaturated Fat: 10gTrans Fat: 0gUnsaturated Fat: 2gCholesterol: 16mgSodium: 134mgCarbohydrates: 30gFiber: 2gSugar: 14gProtein: 3g

Stay connected

Follow us on Instagram


Pesto Zucchini Caprese Salad

Pesto Zucchini Caprese Salad

Yield: 4
Prep Time: 20 minutes
Total Time: 20 minutes

Easy and Delicious. The perfect garden fresh summer dish.

Ingredients

  • PESTO SAUCE:
  • 2 tablespoons pine nuts
  • 2 packed cup of organic basil
  • 3-4 tablespoons extra virgin olive oil
  • 2 small garlic cloves minced
  • My Sage Gourmet Tuscan Herb Seasoning
  • Freshly ground black pepper, to taste
  • ZUCCHINI NOODLES:
  • 2 medium zucchini
  • CAPRESE:
  • 4 half-inch thick slices of tomato
  • 4 quarter-inch thick slice of mozzarella cheese (2oz each)
  • 1 Tablespoon Basil or Garlic infused olive oil, to drizzle overtop.
  • My Sage Gourmet Tuscan Herb Seasoning and freshly ground black pepper- to taste
  • 1/4 teaspoon red pepper flakes (optional)
  • 4 basil leaves, cut chiffonade style (in thin ribbons)

Instructions

PESTO

  1. Place all of the pesto ingredients into a food processor and pulse until creamy. Taste and adjust seasonings if needed.

ZUCCHINI NOODLES (We use a spiral slicer for these. See NOTES below .)

  1. In a big bowl, combine zucchini noodles and pesto sauce. Using hands or rubber spatula, Gently combine until noodles are well coated.
  2. Strain off excess liquid then place zucchini noodles on four small plates, followed by one tomato slice, one slice of mozzarella and a light drizzle of olive oil/balsamic vinegar mixture
  3. Add a pinch My Sage Gourmet Tuscan Herb Seasoning and freshly ground black pepper. Top with basil, evenly distributed.

Notes

Zuke Tips to consider-
Don’t peel your zucchini before spiraling. When you peel the zucchini, moisture leaches out, causing it to become mushy. Keeping the skin also retains nutrients in the skin!
Don’t pre-salt or salt your zucchini once in the pan salting renders the zucchini lifeless and salty.
Don’t overcook. The longer zucchini cooks, the more moisture sneaks out and becomes mushy. A little crunch retains the fresh tasting flavor.

We recommend the VEGETTI SPIRAL SLICER

Nutrition Information:
Yield: 4 Serving Size: 1
Amount Per Serving: Calories: 314Total Fat: 30gSaturated Fat: 5gTrans Fat: 0gUnsaturated Fat: 23gCholesterol: 9mgSodium: 131mgCarbohydrates: 8gFiber: 3gSugar: 3gProtein: 6g

Stay connected

Follow us on Instagram

This Chicken Tofu Stir Fry recipe is so versatile and quick, it can be made in as little as 20 minutes.

I suggest the use of organic and free range meats whenever possible.


Chicken Tofu Stir Fry

Chicken Tofu Stir Fry

Yield: 4-5
Prep Time: 10 minutes
Cook Time: 20 minutes
Total Time: 30 minutes

Quick and versatile, can be made in as little as 20 minutes.

Ingredients

  • 1 lb. ground chicken
  • 2 tablespoons Sesame Oil
  • 1 tablespoon Coconut Oil
  • 1 teaspoon freshly ground black pepper
  • ½ teaspoon My Sage Gourmet Garlic Herb
  • 2 tablespoons Ponzu sauce
  • 1 tablespoon Fish sauce
  • Sriracha sauce to taste
  • 1 teaspoon dried lemongrass or fresh if you have it-shredded
  • Two handfuls kale (center rib removed, leaves torn into bite-size pieces)
  • Handful Napa cabbage torn into bite size pieces
  • 3-4 scallions
  • 2 8.8 oz. packages of Brown Basmati Rice (I recommend Full Circle Market)](http://fullcirclefoods.com)
  • I-16 ounce package extra firm tofu, drained

TOFU MARINADE

  • ½ Cup Ponzu Sauce
  • 2 teaspoon freshly ground pepper
  • 1 teaspoon
  • 1 teaspoon grated fresh ginger
  • Sriracha Sauce to taste
  • 2 tablespoons Olive Oil
  • 1 tablespoon Sesame Seed Oil

Instructions

  1. Prepare the tofu: Drain and slice about 1/4-1/2 inch thick.
  2. Dry Fry: Heat large skillet to medium heat. Do not coat pan. The purpose of the dry fry is to remove moisture allowing better absorption of marinate.
  3. While tofu cooks, mix together marinade. Set aside.
  4. Once tofu has lightly browned on both sides, place in a deep dish in one layer.
  5. Pour reserved marinade mixture over tofu, turning once to coat well. Cover tightly and refrigerate.
  6. In the same large skillet, heat Sesame and Coconut oil over medium high heat (no higher!) Crumble ground meat into pan. Brown meat then drain off excess liquid.
  7. While meat is cooking , cook your rice according to package directions. If you prefer to use a different rice, be sure to allow for cooking time!!
  8. Once meat is cooked and drained, add remaining ingredients (black pepper through scallions) to skillet. Stir to mix. Reduce heat to low simmer for 10 minutes.
  9. Remove from heat. Add tofu to skillet, turning gently to mix.
  10. Serve over cooked rice.

Notes

Makes a great lettuce wrap if grains are not your thing.

You can also eliminate the chicken and still have plenty of protein from the kale and brown rice.

Recommended Products

Nutrition Information:
Yield: 4 Serving Size: 1
Amount Per Serving: Calories: 569Total Fat: 40gSaturated Fat: 10gTrans Fat: 0gUnsaturated Fat: 28gCholesterol: 121mgSodium: 1242mgCarbohydrates: 16gFiber: 3gSugar: 7gProtein: 41g

Stay connected

Follow us on Instagram


Enjoy, and please share!


About Full Circle Market  Brown Basmati Rice packets

I don’t usually go for heat-and-eat packets since I try to avoid microwaving but these little packets are delicious in any stovetop stir fry or fried rice recipe.

Find out more about their products at FullCircleFoods.com


DISCLAIMERAs a food and fitness blogger, I often receive free samples to review but I am never paid for my opinions. The views expressed here are based solely on personal experience with the products and my interactions with the company’s staff. Your experiences and sentiments may differ from my own. 

This is just one of my Kids in the Kitchen friendly recipes for you to try out.

Depending on the age of your little ones, they may be able to do many of the prep tasks in this recipe. Use this guide to help you decide what will be age/ability appropriate. I will tell you that my little one did most all of the tasks (except oven/grill) with my supervision and she is just 4 years old.

Check out my blog post on Kids in the Kitchen


Shows an image of a little girl making mini pizzas

Kid friendly Pizza

Yield: 6
Prep Time: 10 minutes
Cook Time: 10 minutes
Total Time: 20 minutes

Easy Kid friendly Pizza recipe to enjoy with your kiddos.

Ingredients

  • 6 whole grain or sourdough English muffins
  • 1 tablespoon mild BBQ sauce mixed with one teaspoon filtered water
  • 3 (1/2-inch-thick) fresh or canned (drain if canned) pineapple slices
  • 1 (4-ounce) cooked chicken breast, sliced (about 1/4 inch thick)
  • Winona pure Cooking spray **
  • 2/3 cup organic pizza sauce
  • 4 ounces organic grated mozzarella cheese
  • 1/2 teaspoon freshly ground black pepper

Instructions

  1. Remove English muffins from package and split into 12 halves
  2. Arrange English muffins on cookie sheet sprayed with cooking spray or covered in parchment paper
  3. Place BBQ sauce/water in a medium bowl. Add pineapple and cooked chicken breast toss to coat. Drain sauce, then add pineapple and chicken to grill or grill-skillet rack coated with cooking spray; grill 3 minutes on each side or until well marked. Remove from grill/grill skillet; cut into 1-inch pieces.
  4. Preheat oven or BBQ grill to 325 degrees
  5. Spread marinara evenly over pizzas, leaving a 1/2-inch border. Arrange pineapple and chicken over pizzas; sprinkle with cheese.
  6. Place pizzas in oven or on grill rack or BBQ and grill pizzas 5-8 minutes or until cheese melts.
  7. Sprinkle with pepper.
  8. Allow to cool to avoid burns from the cheese


**WINONA PURE COOKING SPRAY can be found here

Stay connected

Follow us on Instagram